
Ring Doorbell
Ring Doorbell Cameras: Battery Swap & Live View Check
Foothills Unitarian Church | For church staff and building volunteers | Free Ring account
Our Two Ring Cameras
Foothills Unitarian Church has two Ring Video Doorbell cameras, both managed through the same Ring app account.
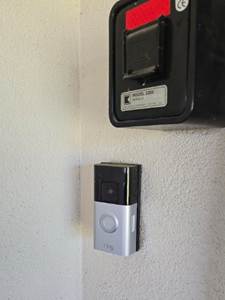
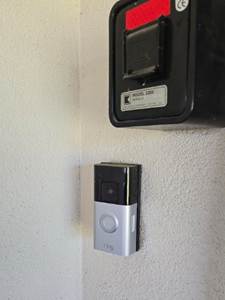
Camera 1 — Front Door (exterior wall near the utility box)
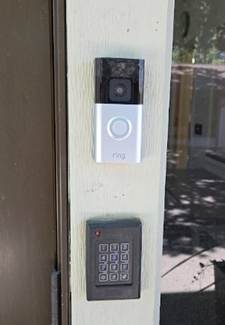
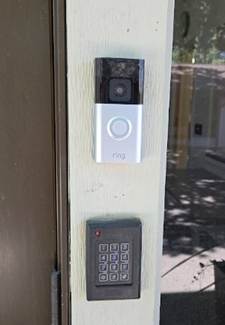
Camera 2 — Main Entrance (door frame above the keypad)
Battery System Overview
The church uses four Ring battery packs managed through a dedicated charging dock. The dock and the blue removal tool are kept on Holly's desk in the staff office.
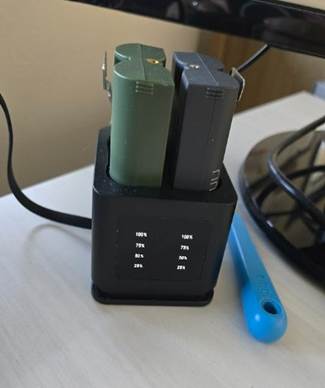
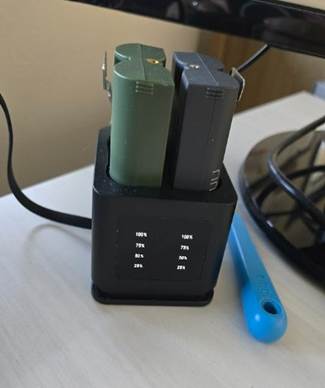
Battery charging dock and blue removal tool on Holly's desk. The front panel shows each battery's charge level: 100%, 75%, 50%, or 25%.
Here is how the four batteries are distributed at any given time:
• 1 battery installed in the Front Door doorbell
• 1 battery installed in the Main Entrance doorbell
• 2 batteries sitting in the charging dock on Holly's desk
Keep both dock batteries at 100% whenever possible so a fully charged battery is always ready for a quick swap.
Part 1: Swapping a Battery
Because we keep fully charged spare batteries in the dock, a swap is quick — pull the depleted battery out of the doorbell, drop it in the dock to charge, and install a fresh one. No waiting required.
Step 1 — Check battery levels in the Ring app
Check the app first so you know which camera needs attention before heading outside.
1. Open the Ring app on your phone or tablet.
2. Tap the three-line menu (☰) in the upper-left corner and select Devices.
3. Both cameras are listed: Front Door and Main Entrance.
4. Tap each camera and check the battery percentage on the dashboard. A battery at 20% or below should be swapped.
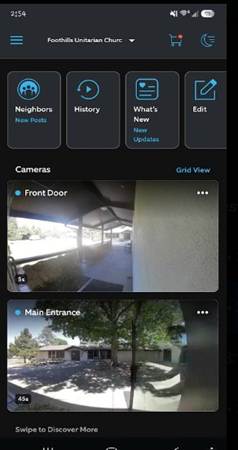
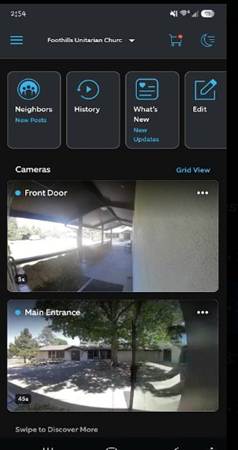
The Ring app home screen showing both cameras — Front Door and Main Entrance — with live thumbnail previews
Step 2 — Grab a fully charged battery and the blue tool from Holly's desk
5. Go to Holly's desk in the staff office.
6. Check the percentage display on the front of the charging dock and select the slot showing 100%.
7. Remove that fully charged battery from the dock.
8. Pick up the blue removal tool beside the dock — you will need it at the camera.
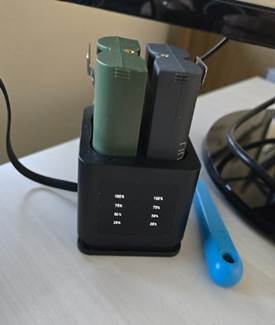
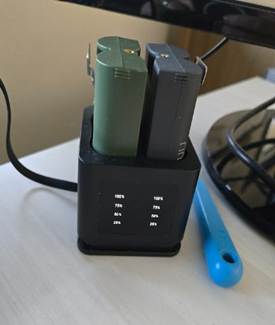
Select the 100% battery and grab the blue tool before heading to the camera
Step 3 — Remove the security screw from the bottom of the doorbell
9. Stand in front of the doorbell and look at the very bottom edge of the silver faceplate.
10. Insert the blue tool into the small screw hole at the bottom and turn counter-clockwise to loosen and remove the security screw.
11. Pocket the screw so it does not get lost — you will need it to reinstall the cover.
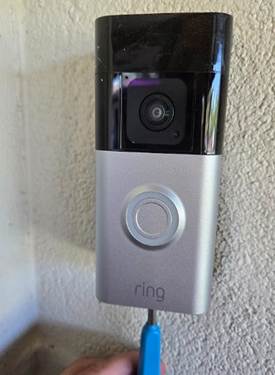
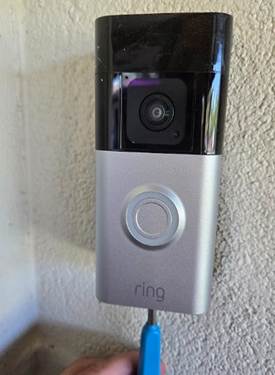
Insert the blue tool into the screw hole at the bottom of the doorbell faceplate and turn counter-clockwise to remove the security screw
Step 4 — Lift the silver cover off
12. Once the screw is out, grip the sides of the silver faceplate.
13. Slide it straight upward — the cover lifts cleanly off the black mounting bracket behind it.
14. Set the cover aside on a safe surface. The black bracket stays on the wall.
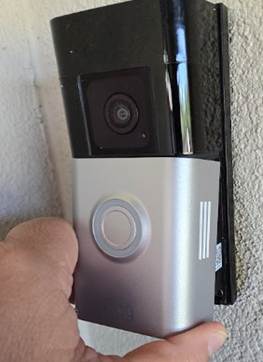
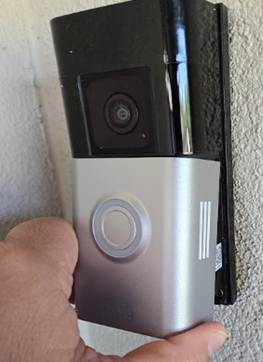
The silver faceplate slides straight up and off the black wall bracket — the camera and battery are now accessible
Step 5 — Press PUSH to release the old battery
15. Look at the bottom of the exposed unit. You will see a metal tab labeled PUSH.
16. Press the PUSH tab firmly. The old battery pack will slide out from the bottom.
17. Remove the battery completely and set it aside — this is the depleted battery you will return to the dock.
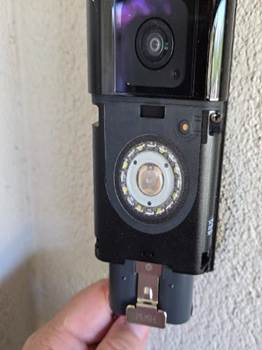
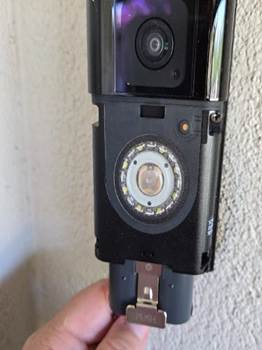
Press the metal PUSH tab at the bottom — the battery slides out from the base of the unit
Step 6 — Insert the fully charged battery
18. Take the fully charged battery you brought from Holly's desk.
19. Slide it into the slot where the old battery came out. Push it in firmly until you feel and hear a click.
20. When the battery makes contact, the ring around the doorbell button will flash blue — this confirms the battery is seated and the camera is powering on.
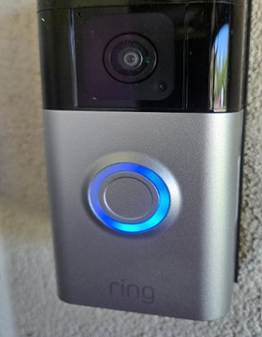
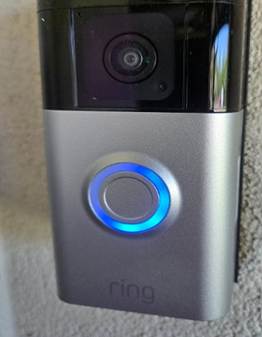
A blue ring flashing around the doorbell button confirms the new battery is installed and the camera is powering on
Step 7 — Reinstall the silver cover
21. Line up the silver faceplate with the black bracket on the wall. The cover slots in from above — tilt the top in first, then press the bottom flush.
22. Slide it downward until it sits snug against the bracket.
23. Reinsert the security screw at the bottom using the blue tool and tighten clockwise.
24. Return the blue tool to Holly's desk.
[ Screenshot: Silver cover being slid back down onto the bracket and screw being tightened ]
Step 8 — Return the depleted battery to the dock
25. Bring the depleted battery back to Holly's desk.
26. Place it in the now-empty slot in the charging dock.
27. Confirm the dock display shows a low percentage on that slot and is actively charging.
28. A full recharge takes approximately 5–10 hours. The dock will show 100% when complete.
Always return a depleted battery to the dock right away so it is ready for the next swap
Step 9 — Confirm in the app
29. Open the Ring app and go to Devices.
30. Tap the camera you just serviced and verify the battery percentage has updated (may take a minute or two).
31. The camera status should show Online. If it shows Offline after two minutes, remove and reinsert the battery to power-cycle the unit.
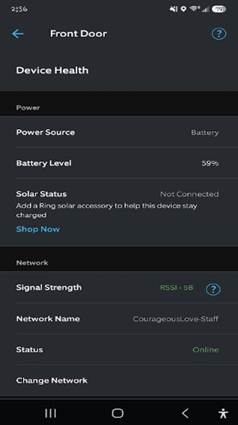
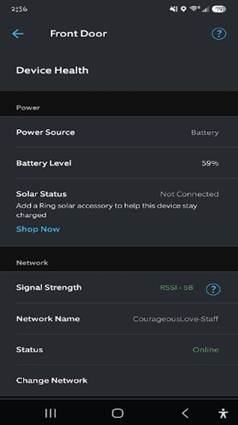
Device Health screen showing battery level and Online status — confirm both look correct after a swap
Part 2: Viewing the Cameras (Live View)
The free Ring account lets you pull up a live video feed from either camera at any time. Note: the free plan does not include recorded video history — only live viewing and real-time doorbell alerts.
Step 1 — Open the Ring app and sign in
32. Open the Ring app on your phone or tablet.
33. Sign in with the church's Ring account credentials. The login is stored in Dashlane — ask Holly if you need access.
Note: If you do not have the login saved on your device, the credentials are stored in Dashlane — ask Holly for access.
Step 2 — Select a camera
34. On the app home screen you will see both cameras listed under Cameras: Front Door and Main Entrance.
35. Tap the thumbnail of the camera you want to view. This opens that camera's dashboard.
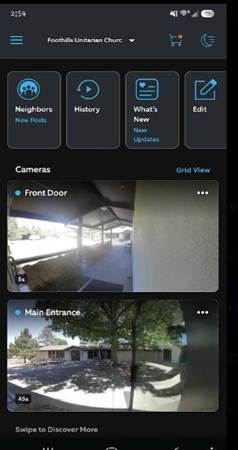
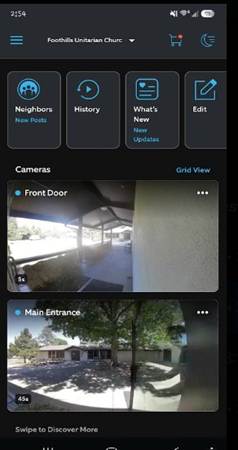
The Ring app home screen — tap the Front Door or Main Entrance thumbnail to open that camera's dashboard
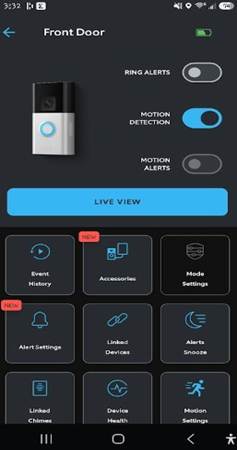
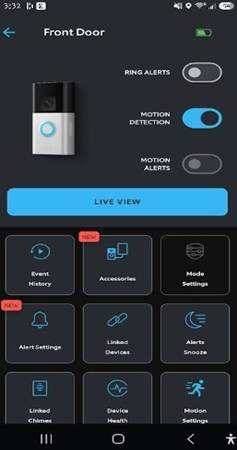
The camera dashboard — shows Ring Alerts and Motion Detection toggles, and the blue LIVE VIEW button
Step 3 — Launch Live View
36. On the camera dashboard, tap the large blue LIVE VIEW button.
37. The app connects to the camera in about 5–15 seconds.
38. You will see a real-time video feed. Tap the microphone icon to speak through the doorbell's speaker if needed.
39. Live View sessions on the free plan last up to 10 minutes before auto-disconnecting.
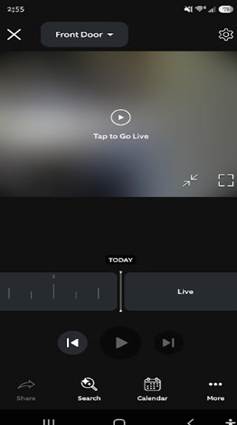
The Live View screen — tap the play button to connect to the live feed. The timeline at the bottom shows Today with a Live marker on the right.
Step 4 — End the session
40. Tap the X or the back arrow to exit Live View. No recording is saved on the free plan.
Troubleshooting
Problem: Camera shows Offline in the app
Fix: Check that the battery is fully charged and properly seated. Remove and reinsert the battery pack to power-cycle the camera. You should see the blue ring flash when the battery makes contact. Also verify the church Wi-Fi is working — the doorbell must be within range of the router to connect.
Problem: No blue ring flash when battery is inserted
Fix: The battery may not be fully seated. Remove it and firmly reinsert it until you hear a click. If it still does not flash, try the other charged battery from the dock. If neither battery triggers the blue flash, let Holly know.
Problem: Live View spins and never connects
Fix: Check your phone's Wi-Fi or cellular signal. Close and reopen the Ring app and try again. If the problem continues, go to Device Health in the app and run the Reconnect to Wi-Fi wizard.
Problem: Battery percentage does not update after a swap
Fix: Pull down on the Devices screen to force a refresh. Battery percentage can lag 1–5 minutes after reinstallation. If it still does not update, remove and reinsert the battery.
Problem: The dock shows no charge on a battery
Fix: Check that the dock's power cable is firmly plugged in. Try reseating the battery in the dock slot. If a battery consistently will not charge, let Holly know — it may need to be replaced.
Problem: The blue tool is not on Holly's desk
Fix: Check the building office. A replacement T5 or T6 Torx screwdriver from any hardware store will also work. Let Holly know so the tool can be returned or replaced.
Problem: The app says 'No Subscription' for video history
Fix: On the free Ring account, recorded video history is not available. Only Live View and real-time doorbell alerts are included. Contact Holly if recorded history access is needed.
FAQs
Q: How do I know the battery is properly installed?
A: When the battery seats correctly, you will hear a click and the ring around the doorbell button will flash blue. If you do not see the blue flash, remove the battery and reinsert it more firmly.
Q: How often will the batteries need to be swapped?
A: Typically every 6–12 months, though a high-traffic entrance like the Main Entrance may need swapping every 2–3 months. The app sends a notification when a battery drops below 20%. With two charged spares in the dock, a swap takes just a few minutes.
Q: How do I read the charge level on the dock?
A: The front panel of the dock shows percentage labels: 100%, 75%, 50%, and 25%. The lit indicators for each battery slot show its current charge. Always install a battery showing 100% into the doorbell.
Q: Can more than one staff member use the Ring app at the same time?
A: Yes. Holly can add staff as Shared Users under Account > Shared Users in the app. Shared users can view Live View and respond to doorbell alerts.
Q: Does Live View save a recording?
A: No, not on the free plan. If you need to save footage, use your phone's built-in screen recording feature.
Q: Will removing the doorbell cover trigger an alarm?
A: No. The Ring doorbell is not connected to the building's alarm system. Removing the cover simply takes the camera offline temporarily in the Ring app until the battery is reinstalled.
Q: Is the keypad below the Main Entrance camera part of Ring?
A: No. The keypad is a separate access control device and is completely unaffected by anything you do to the Ring doorbell above it.
Q: What if the doorbell will not reconnect to Wi-Fi after a battery swap?
A: In the Ring app, go to Devices, tap the camera, select Device Health, and tap Reconnect to Wi-Fi. Follow the in-app steps to re-enter the network password. This takes about 3 minutes.